
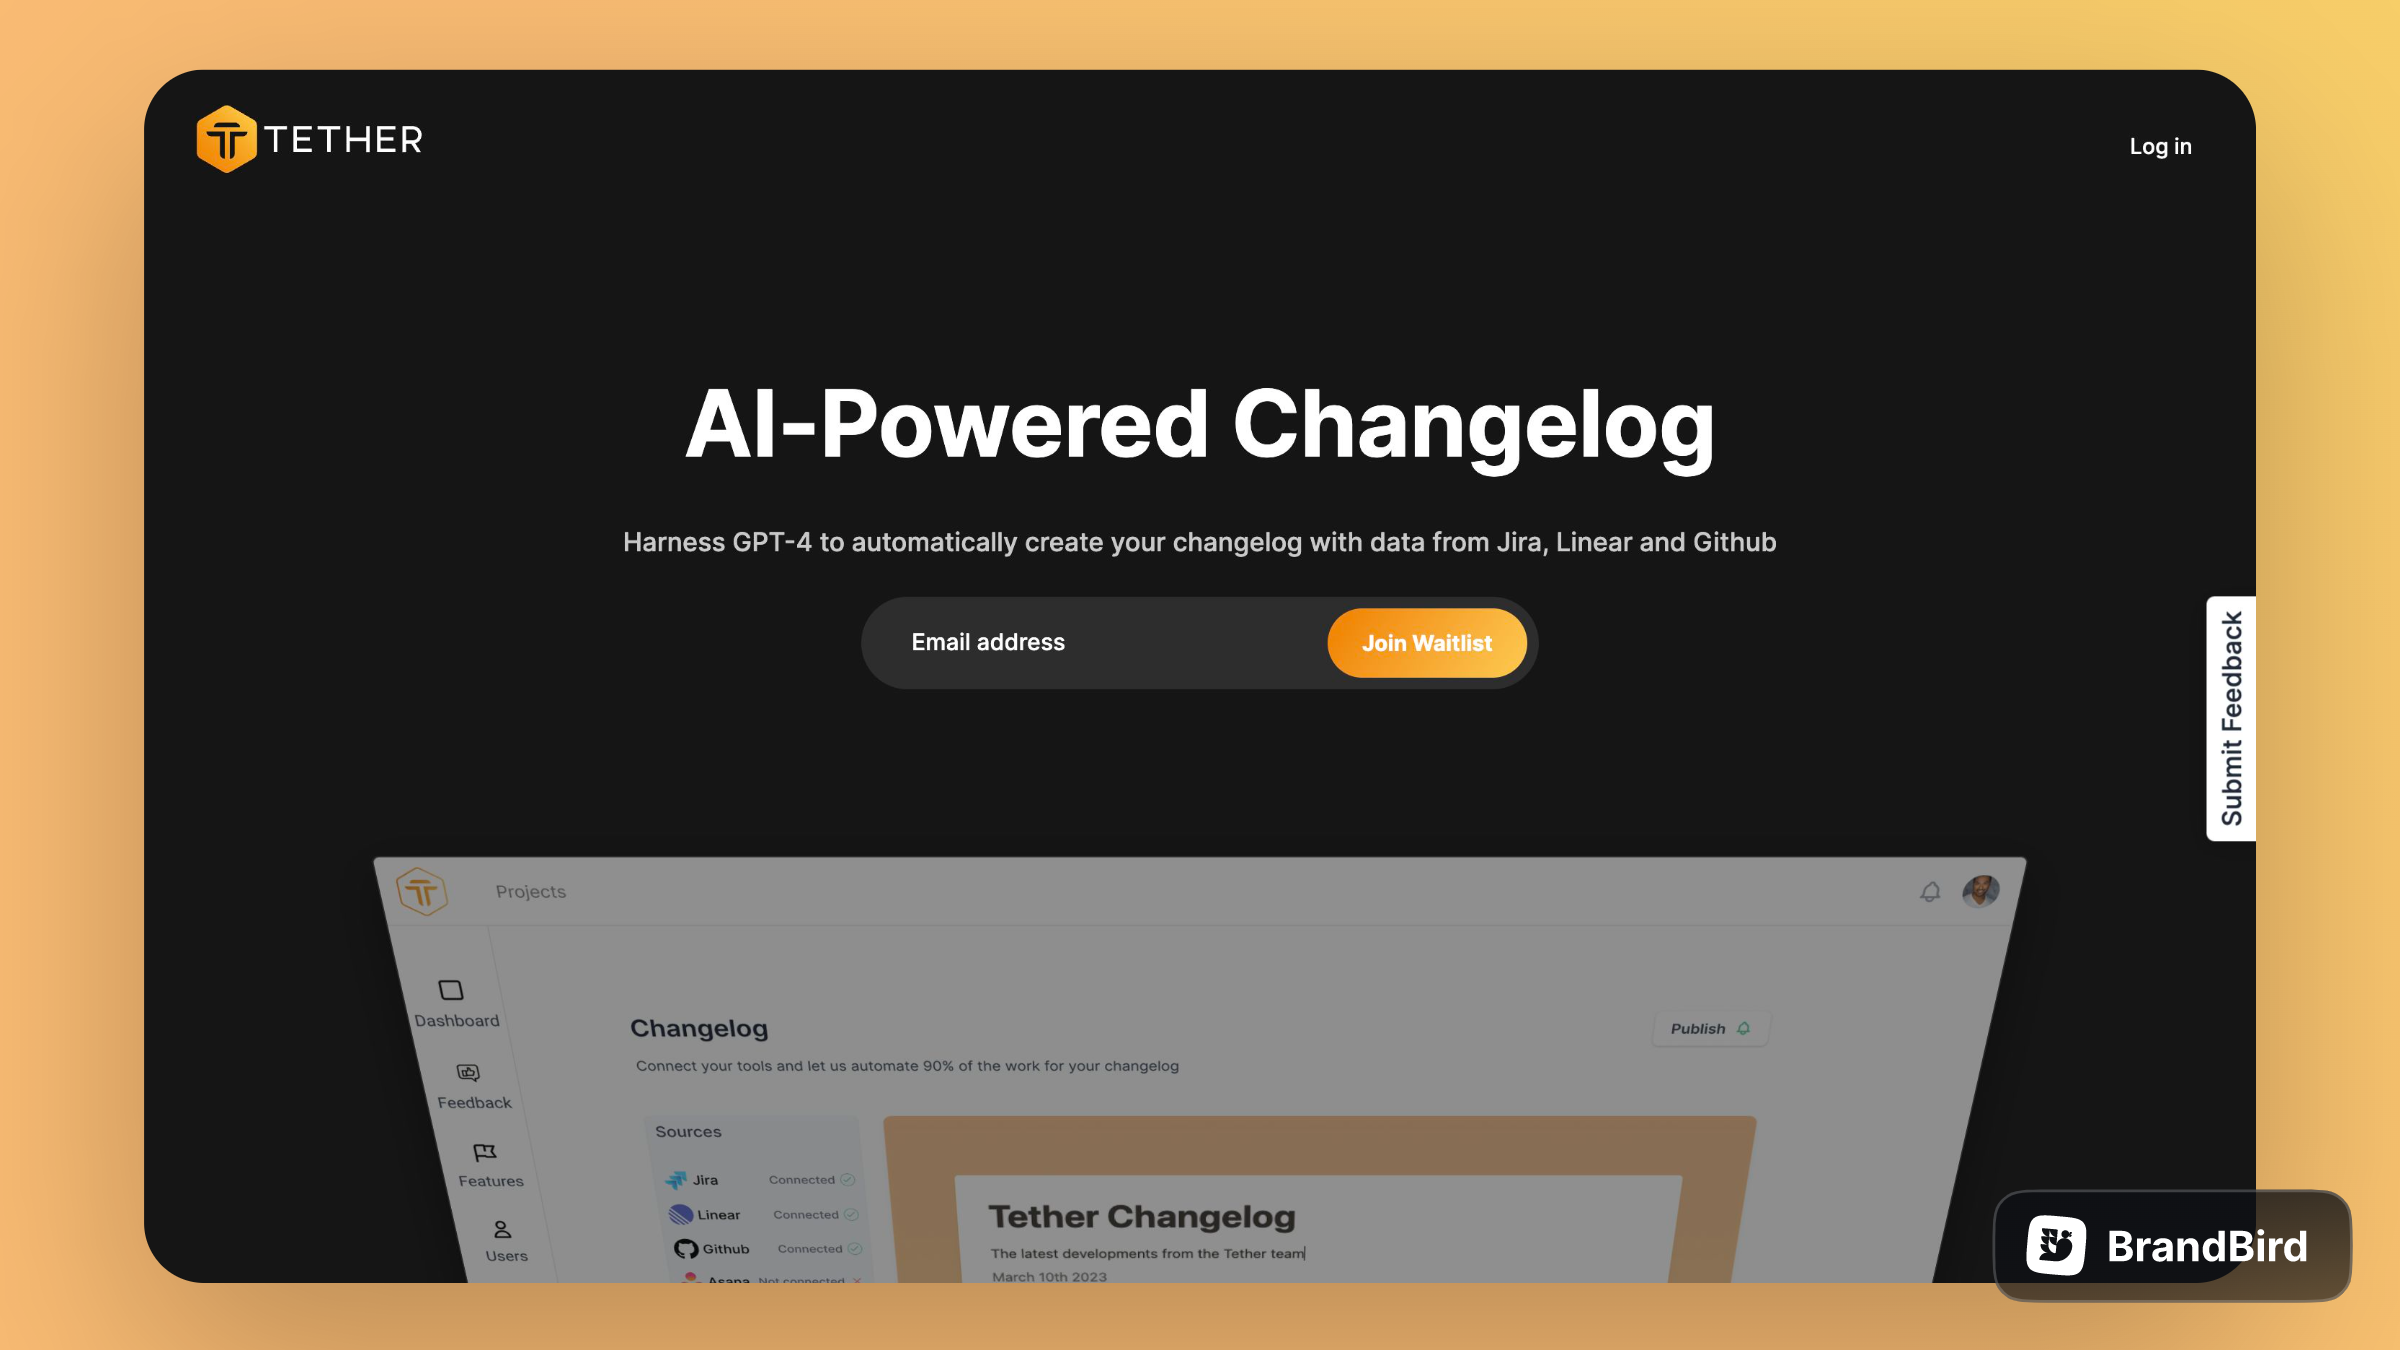
A week feels like a years time when it comes to AI developments recently. With GPT-4 dropping last week, I wanted to test it out on a side project. I've been toying with the idea of creating a Changelog app that leverages GPT to summarize Git commits, Jira tasks, Linear tickets, and more, and the timing seemed perfect.
Over the weekend, I put together a proof of concept using a no-code stack consisting of Airtable, Zapier, and Bubble. In this article, I'll walk you through each step of the process. From initial setup and troubleshooting to the completed "product.”
I'll also go into details about how we launched a landing page + Stripe link to validate demand and how we even received some pre-orders for a product that isn't built yet.
Lets dive in!
🛠️Tools
Alright lets take a quick look at our stack:
- Airtable: We’ll store our Github data in Airtable for easy access. Commit messages, summaries from GPT-4, etc.
- Zapier: We’ll use Zapier to connect Github and Airtable. We are going to build a Zap that polls Github commits, extracts messages and sends it to GPT-4 for summarization
- Bubble: We’ll use Bubble to stand up a front-end to display our changelog data
- Webflow: I stood up a landing page for this project after wrapping it up
- Stripe: Spun up a payment link to collect pre-orders to validate this idea
- Prompthub: Test and collaborate on prompts
Step 1: Setting up Airtable
First I got my base in Airtable set up. Nothing special, just added some columns that I thought I would need, knowing I would have to come back and edit them later.
Added the commit author, date, message and some other metadata. I also added a column for the GPT-4 summurization which will populate from Zapier
Step 2: Setting up a Zap
Below is what the final zap looks like
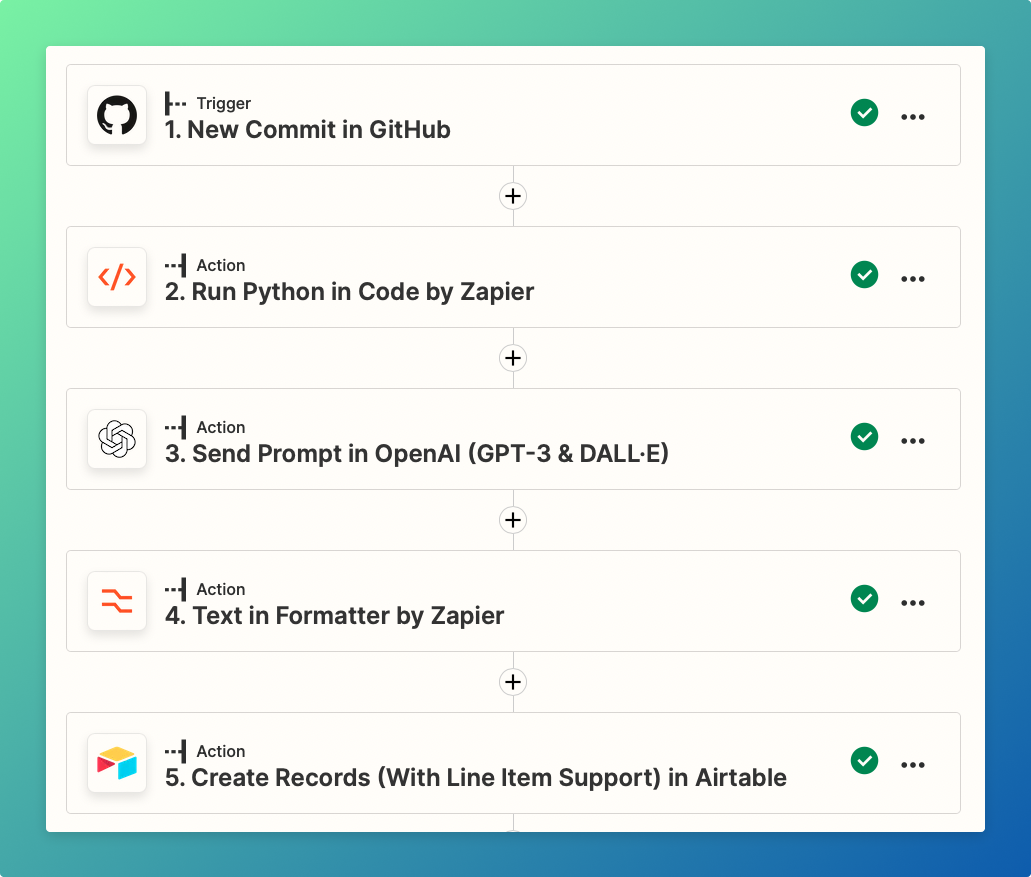
New commit in Github: Select the "new commit" event, choose a repo and test
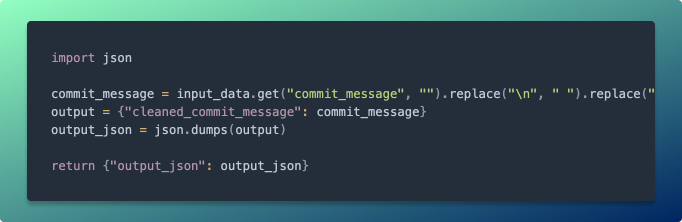
Run Python in Code by Zapier: I was running into some issues with line breaks in later steps, so I added this step in to clean up the commit messages I was getting from Github.
Send Prompt to OpenAI: This step was initiallly a custom webhook but I was running into weird format and request issues when sending data to OpenAI, so I elected to use their native connection.
Connect your account, select a model (text-davinci-003) and supply a prompt. I had to massage the prompt a little to get it working how I wanted. I wanted to make sure I received a header and a sub-header so styling the data would be easy on the front end. The AI also kept returning the words “header” and “sub-header” into the response which I had to fix.
Below is the final prompt, and I can now say I am way more understanding of when people complain about prompt engineering.
I left all the remaining values underneath the prompt as is.
Text in Formatter by Zapier: Used this to split the response from OpenAI into 2 seperate values, a header and subheader. This allows me to style them differently on the frontend and make the changelog look how it should.
Initially I used the Split Text Transform property, but that didn’t work, so I went with the Extract Pattern and that seemed to work better.
Set it up to look for line breaks.
RegEx used below
Create Records in Airtable: There was a lot of trial an error getting to this step, but once all the tests passed and my prompt was returning an ideal response, mapping the fields was easy. I had to go back to my Airtable base and split my Summary column into a Header and Sub-header column. But that was about it.
Tested it a few times with different commits and watched the data fill in Airtable. Everything was looking good, now it’s time to populate this data on a web page.
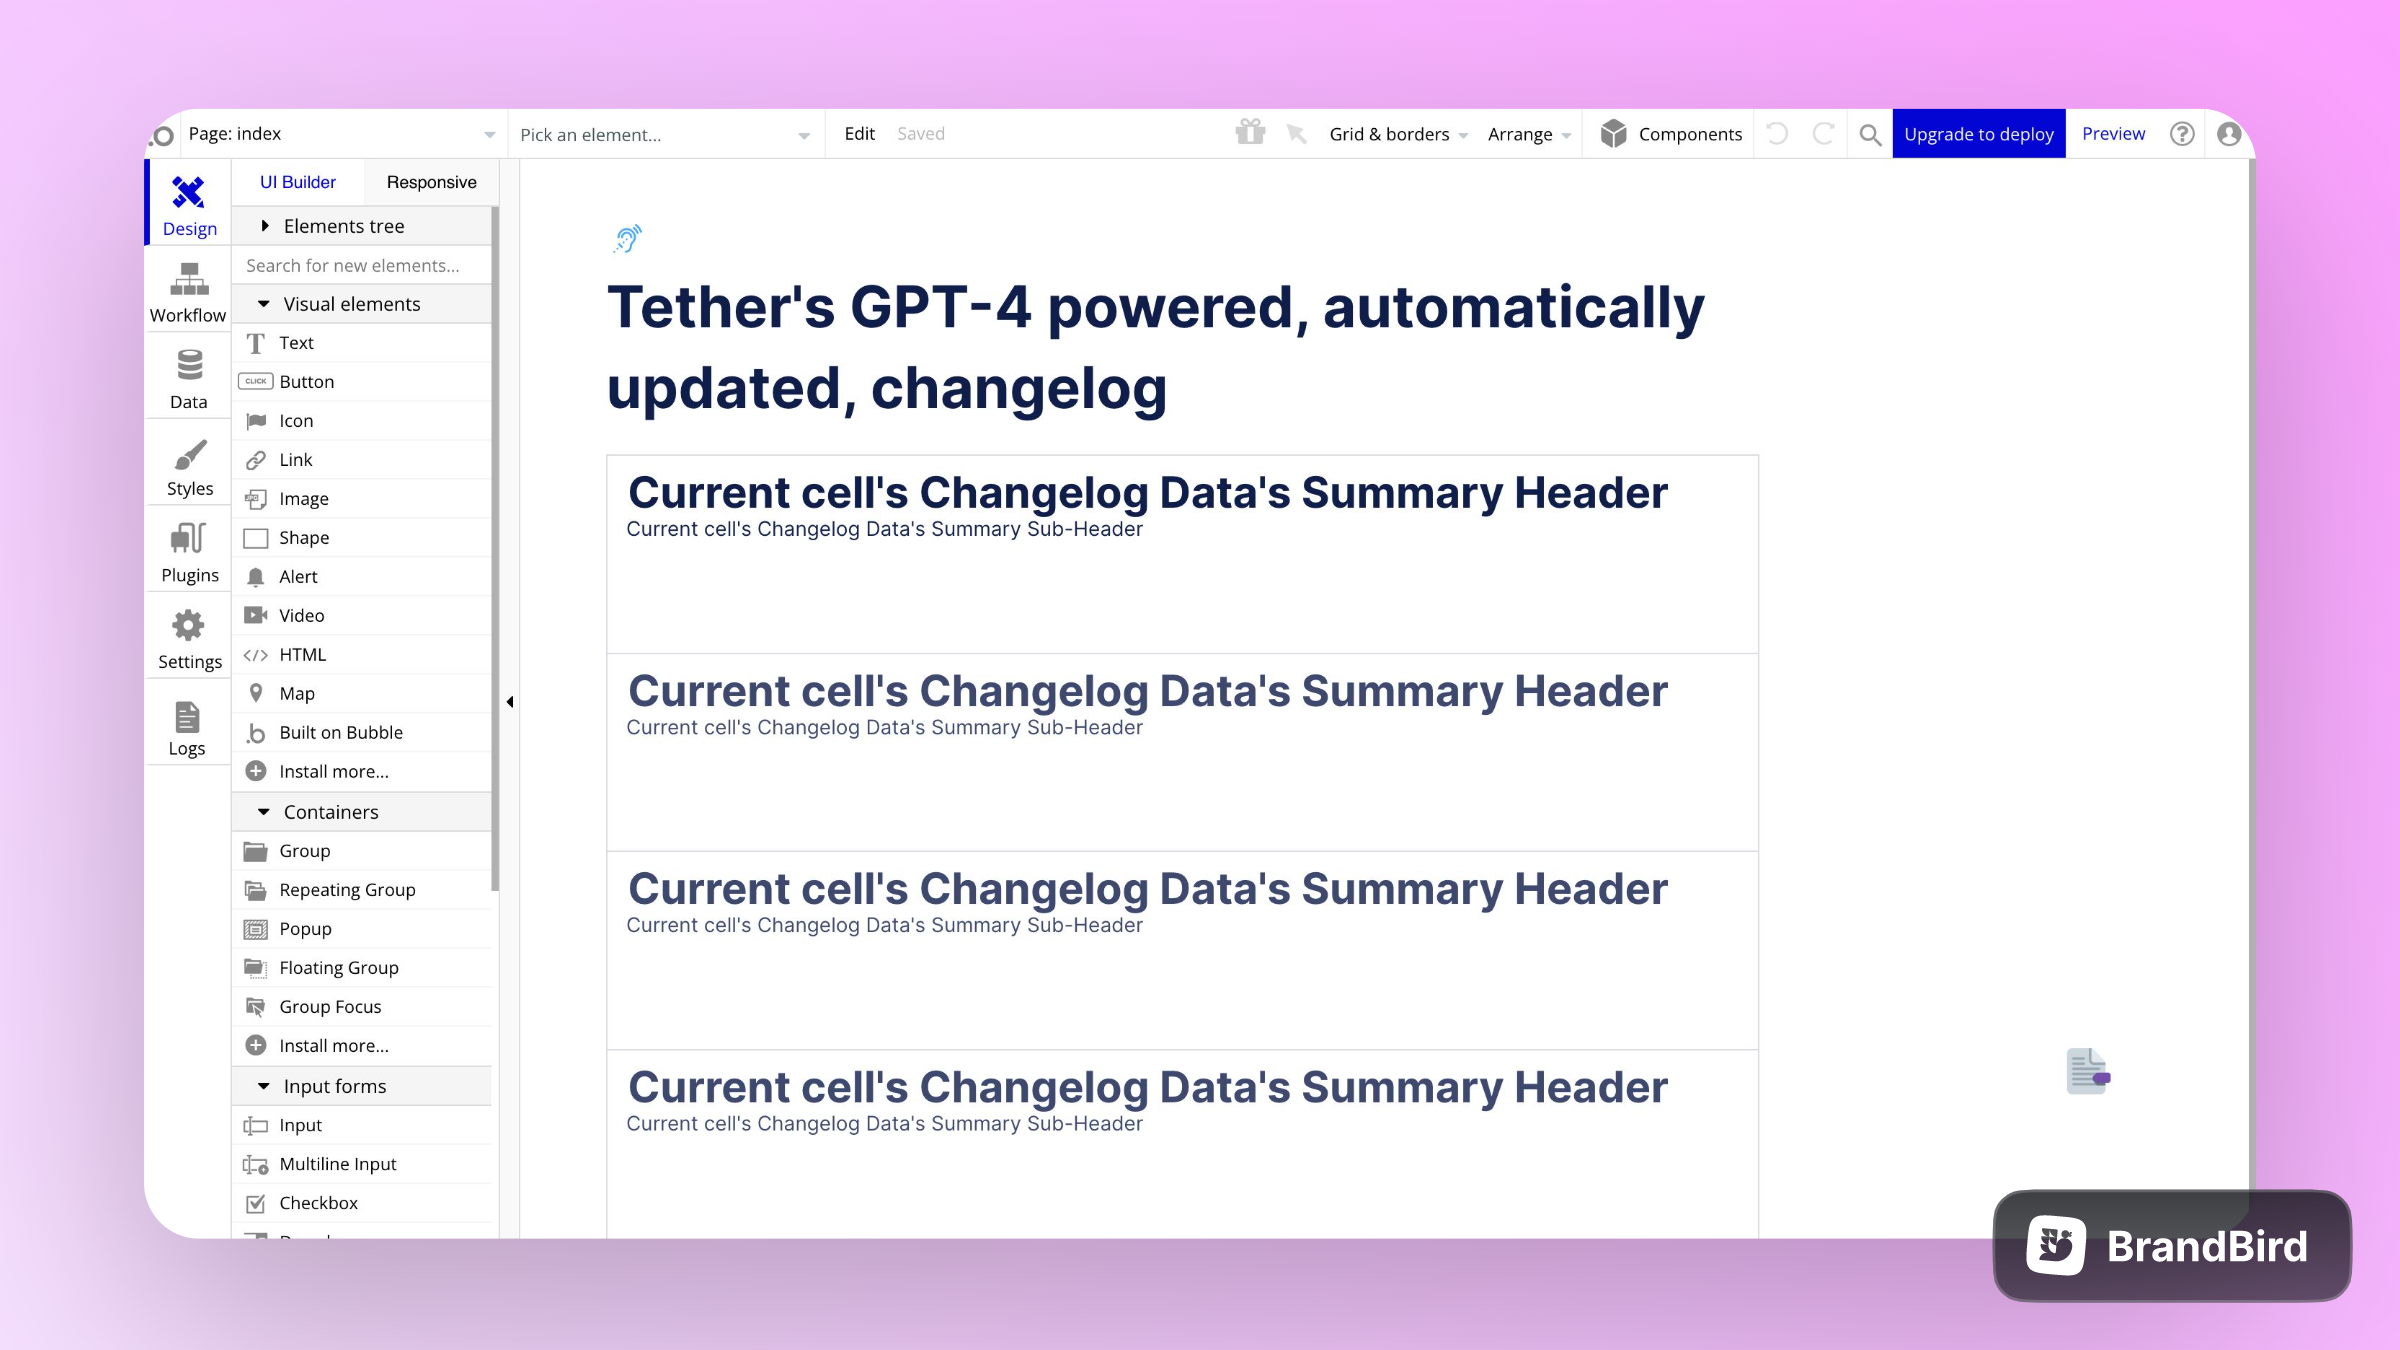
Step 3: Setting up our frontend in Bubble
This was my first time using Bubble and honeslty the software in general isn’t super intuative, but generally here’s what the steps looked like.
- Connect Airtable from the plugins page (on the side nav)
- Add a header to the page
- Add a Repeating Group Element
- Drop a header in there. This is going to be the header generated from our Zap. You’ll need to click in the text box that says “…edit me…” then click “Get data from an external API” in order to connect your Airtable data.
- Drop a text block in for our sub-header and connect it to the correct column from Airtable
- (Optional) Drop another text block to pull in the date.
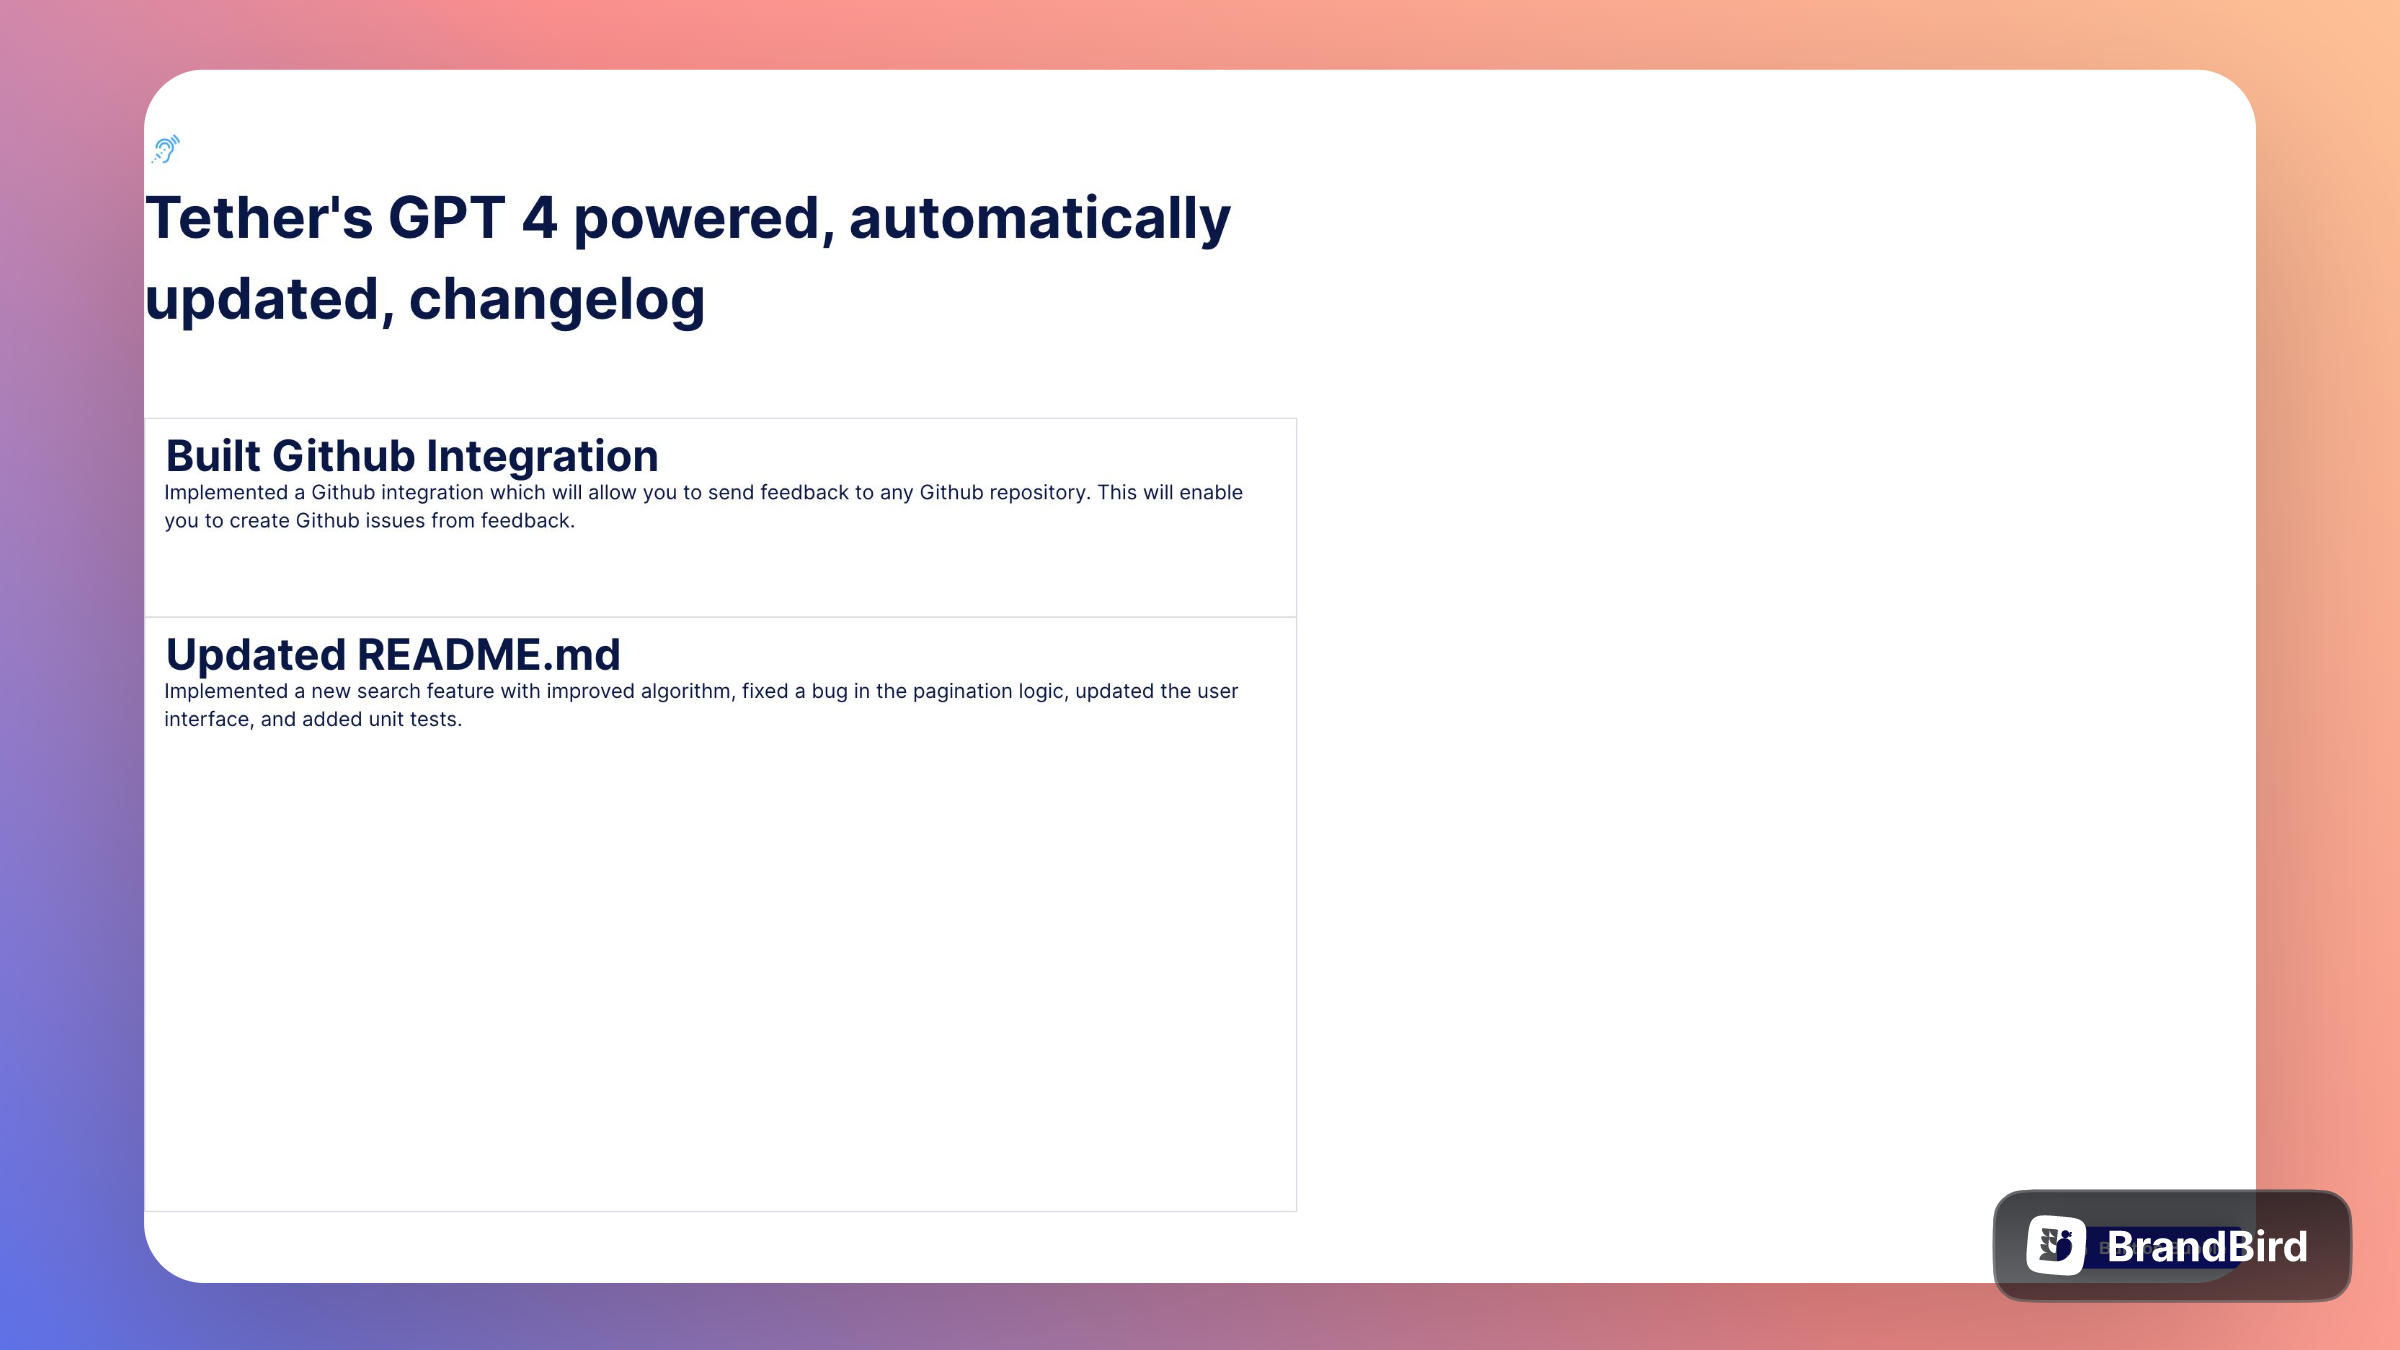
You can edit the header to say something like “Changelog for <<company name>>” or whatever floats your boat. But that about raps it up. We now have a Zap that can run in the background, listen for commits, summarize them and push them to Airtable. Our Bubble app can countinally access the data and update as it changes.
You now have a fully automated, AI powered changelog 🎊.
Now lets validate
We could think of lots of additional features from here, but this was intended to be a PoC and it works. Rather then spending time building out features, lets validate that there is a need for this product.
I stood up a quick landing page in Webflow, added some content, inserted a Stripe payment link and hit publish.
Why start selling a product that isn’t built?
The main reason startups fail is because they don’t build something people want. While building our core product, Tether, we built a bunch of features that we eventually scrapped. I didn’t want that to happen this time around. Getting money upfront from users is great validation that they have a problem worth solving.

Getting Pre-orders
The goal here is to validate the product concept by getting atleast a few pre-orders. So we’ll need to put our marketing hats on. I don’t view myself as a good marketer, never have, but we are going to do our best!
I put together this Tweet thread and Linkedin post to drive some traffic, and it worked! We got our first pre-orders.

If you don’t want to hack together you’re own Changelog every week/month for your SaaS and you’d like the robots to help, feel free to get early access to our tool via our Stripe payment page here.
Act now and you get 3 months of our Tether Startup subscription for only $50. Otherwise to access the tool you’ll need to get one of our paid plans in the coming weeks
Closing
I hope this was helpful. If there was anything I missed or if you have any questions feel free to reach out in live-chat or on Twitter. If you want more AI tutorials like this feel free to subscribe to our list.
Happy building!


